Want to Monetise your Website or Blog?
Becoming an Amazon Associate is one way to earn income.
This post gives you a breakdown of the process of becoming an Amazon Associate so you know how to get signed and start earning.
What is Amazon Associates?
The Amazon affiliate program, also called Amazon Associates, is an affiliate marketing program and can be an effective way to monetise your website or blog.
![]()
Becoming an Amazon Associate is free for website owners and bloggers so anyone can sign up to the program, and on receiving approval, place Amazon affiliate links on their site.
The links provided by Amazon include products or banners, widgets, special links/ promos, or other seasonal ads from Amazon Associates in various sizes. You choose which content and size to display on your site.
Here are some examples:
 |
 |
 |
Once these links are placed on your site, your website visitors can click any of the links which will take them to the Amazon site.
If they then make an Amazon purchase of any product (not only the one you may have linked to) and, within a specified time frame, you get referrer commission on the sale. Simple, right?
I didn’t find it that way so I’ve written this post to help you do it better. It includes a step by step guide with images of what you’ll see and need to fill in to become an associate with Amazon.
So how exactly do you sign up and what do all the affiliate words mean?
How to join the Amazon Associates program – A Step by Step Guide on Becoming an Affiliate
- Create your website, app or blog
- Head to the Amazon Associates page
- Sign up to the program by filling in your profile on their page
- Put Amazon Associate links on your webpage or blog
Follow these steps:
Step 1. CREATE A WEBSITE, APP OR BLOG
- First you’ll need an active website, YouTube channel, Amazon/ Google Play or Apple app, or a blog owned by you.
- Make sure you’ve added some content to it e.g. an About page, a Blog page with posts, a Contact page etc.
- Know what your website’s purpose is as Amazon Associates will ask you about this in the application process so you’ll need to have an idea of who your audience is and how you’ll generate traffic.
![]()
Step 2. GO TO THE AMAZON ASSOCIATES HOMEPAGE & CREATE YOUR ASSOCIATES PROFILE/ ACCOUNT
The page looks similar to this:
![]()
- Click on the
 button. (If you already have a regular Amazon account, log in to it and click ‘New Customer’.)
- Enter your details as requested – You’ll need a name, email etc.
- Click

Next this popup below will show so head over to the account of the email you gave and open the verification email they’ve just sent you and enter the 6 digit code from it into the ‘Enter Code’ box as shown below.

Click the orange ‘Verify’ button.
Next, this progress bar shows up:

Underneath it says,
Important: Please read these instructions before you fill in this form.
When you click ‘these instructions’ it says:

After reading the instructions, proceed as follows:
1. Enter your account information
- Fill in the ‘Account Information’ boxes that follow.
They look like this:

Fill in all boxes marked with a red asterisk * (name, address, phone number of payee etc.)
Then click ‘Next’.
2. Enter your website information
This page then appears.

- Read the instructions for filling out this section by clicking on these instructions.
Important: Please read these instructions before you fill in this form.
The instructions are:

- Enter your website address and click ‘Add’ and it will appear in the ‘Your Website List’ box below.

- Then read the sentence underneath the ‘Your Website List’ box shown above which says:

- Click whatever applies to you. *Note that if you do aim your site at children under 13 you’re not allowed to display Amazon Associate ads on it and should proceed no further.
- Click
![]()
- Click

Step 4. ENTER YOUR PROFILE INFORMATION
The next page is your ‘Profile’ page. It looks like this:

- Read the instructions for filling out this section
Important: Please read these instructions before you fill in this form.
The instructions are:

- Fill in your profile. Be clear and descriptive so Amazon has something to work with.
- Enter your preferred store ID – usually the same as your website name – I entered ‘worldskoolie’ for mine since my website is worldskoolie.com. Tip: They’ll use this ID to generate code links for you so they know when customers come from your site so make it relevant.
- Explain what your site is about.

- Select the topics you think your site/blog covers.

- Explain how you will get traffic to your site, how you generate income, build links, and also how many visitors your site has monthly.
- At the end it asks you to enter the code shown like in the image below. Do that and click ‘Next’.

After that, you’ll be taken to the ‘Identity Verification’ page.
1. Enter your phone number

- Enter your country’s calling code in the grey box then enter your phone number in the white box.
- Click ‘Call Me Now’.
- Amazon will call your designated phone number. Answer the call.
- It is automated and will ask you to use your phone’s number pad to enter the 4 digit pin that shows up in the ‘Phone Pin’ box after the call initiates.
- The phone pin box appears below the phone number box once you’ve clicked ‘Call Me Now’.
- During the call, when asked, enter the pin using your phone’s number pad. If correctly done it will say you are successfully verified and end the call.
*While doing this don’t have your phone on ‘Do not disturb’ like I did at first or the calls from Amazon go to voice mail and the process fails. Don’t worry it this happens though you can try again. If you have too many failed pin entry attempts, you can try again an hour later.
Next, you’ll see this screen:

- The last info to read is the ‘Associates Program Operating Agreement’.
- It starts like this and contains the outline/ conditions of program use…

- Tick the box beneath it and then click ‘Finish’.
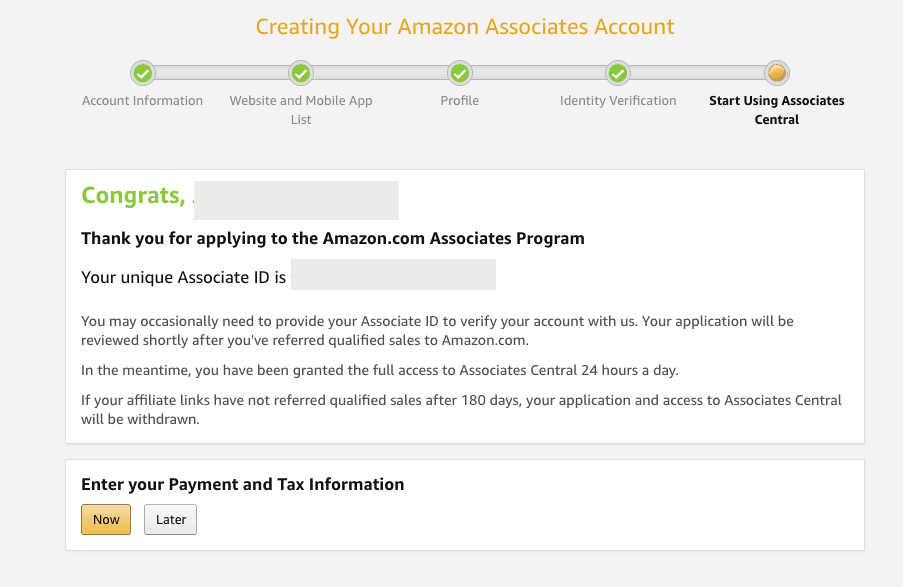
- The final page thanks you for applying to Amazon Associates and gives you your unique Associate ID. Record it somewhere. A spreadsheet of affiliate info could be useful for keeping track as they can ask you to use it to verify your identity in the future. You’ll also see this ID show up in your affiliate links as they use it to track where customers originate from.
2. Choose payment method
- Choose whether to enter your payment and tax ID information now or later.

- Choose which payment option you want.

Once your tax information has been entered you’ll see this page:

You can alter any of this information relating to your account by clicking on a given topic and making changes.
Next, click on ‘Home’ and it’ll take you to your dashboard page looking like this:

- This is your new homepage showing your earnings summaries, number of clicks, fees, and your monthly summary.
Hooray!

Step 4. CREATE YOUR AFFILIATE LINKS
At the top of your affiliate homepage is a search bar.
This is where you enter product names or descriptions you want to link to on your webpage for example, I entered ‘parenting’ in the search bar.

How to Create your Amazon Associates links
- Choose either the ‘Quick Links’ or ‘Browse for Product’ tab at the top of your dashboard page
- ‘Quick Links’ allows you to search for product keywords
- ‘Browse for Product’ lets you search using categories like ‘Books’ etc.
- When you find the product you want, click the ‘Get Link’ button
- It’ll give you tabbed options across the top:
text & image text only image only

- Let’s say I choose ‘Image only’. The product will just show as a visual with no pricing or descriptions – like this:

You can customise the image size that will appear on your webpage by changing it on this page. It shows size ‘large image’ on the left side at the moment but I like the medium size for the links on my resources page. They’re great for galleries too.
Once you’ve chosen your type of link and its size, the HTML code for that link shows up looking like this below:

- Click ‘Highlight HTML’

- Copy & paste the link/ its shortcode or the HTML version into the page you want it to appear on your site.
I use WordPress for my site so in the page editor screen if I’m using the WordPress Block Editor, I add a ‘Custom HTML’ block and paste the code straight in there. It may render as two small grey boxes but when you preview your page it shows up as an actual product image.
So instead of it looking like this: 
you get this live:
However, if I’m using the WordPress Classic Editor, I go to the ‘Text’ tab at the top of my post editor on the right (it has two tabs there – Visual & Text), choose Text and paste the HTML code where I want it to go on that page.
To use this way requires some understanding of what all the code means so you insert the new code in the place you actually want it. I usually wait for the cursor to start flashing on the Text tab page first then add it in.
Once it’s pasted in, click back over to the Visual tab and it should show up as a picture there. If you want to move it just cut/copy and paste it as once it’s in it’s easy to edit.
Then I click the ‘Save Draft’ button and then ‘Preview’ on my WordPress page and it shows me what my post will look like on a live page.
- If you’re happy with how it renders, click ‘Publish’. Edit if you’re not satisfied.
- After you’ve created an Amazon Associate account, you’ve got 180 days for 3 referred qualified sales to come from your site. After this your account is reviewed and will be closed if at least this number of sales were not generated by your site.
- You can reapply if this happens to you but I suggest that you do it only once you’ve improved your traffic and sales generation strategies or you’ll find yourself in the same boat again.
What now?
Once you’ve signed up as an associate, creating good website content that helps your audience will help drive your affiliate sales so if you haven’t already, how about writing a post about a product? Or a post comparing a few products?
You could even create a ‘Resources’ page on your website where you list all the tools & products you use or recommend. Many of these tools or products could be Amazon links and when visitors click through to Amazon from your site and place orders, you’ll be on your way to earning an affiliate income for yourself.
I hope that this detailed post about how to sign up as an Amazon Associate and begin the journey to monetising your site was helpful.
Please share, pin it and comment below.


Your constructive feedback on my posts helps me to improve them.
Also feel free to share any other relevant tips or ways to generate income on your blog or site.
Thanks!

Meagan


