I’ve just started a store on Teachers Pay Teachers (TPT) which gives educators a space to buy and sell resources they’ve made to help others save time and money.
It was much easier than I thought to set up a store and to be honest I had left it on my to-do list for too long considering how quick and easy it has been to set up and begin listing products.
You see, in my free time I had been focussing on the resource creation side, which I find pretty satisfying. I love making resources that help people learn, save me time and that I can build on from year to year for different age groups.
Setting up a TPT store is part of my quest for time and money freedom and I hope that it will bring in some additional income over time.
This post is about how I upgraded my Teachers Pay Teachers store graphics for free using Canva and PowerPoint. I hope in sharing how I did it, that you will be encouraged to save yourself some time and money by doing it yourself too.
*Some links in this post are to affiliates. Clicking on them may lead to me earning a commission but all opinions are my own and it’ll cost you nothing.
Free Graphic Design Tools You Can Use
While I’ve been using PowerPoint to create resources and graphics for my TPT store, I’m switching focus to Canva lately.
It’s a powerful online graphic design tool and despite only having the free version currently, I’ve been able to make some awesome layouts, banners, posters, pins and most recently created our class pages for the school magazine.
Canva is a cloud based tool so you can access all of the designs on your virtual shelf anywhere. It also works on all device types so I have no issues switching between a PC and Mac.
A bonus for educators is that you can get access to ‘Canva for Education’ 100% free. It has all the power of ‘Canva Pro’, but is tailored for classrooms. You can use it to create presentations, decor, infographics, lesson plans, worksheets, banners, displays and on till sunset.
‘Canva for Education’ advertises the following perks on their website:
-
Access 420,000+ templates and learning resources
-
Use 75 million+ premium stock images, videos, and graphics for free
-
Access to an extended library of 3,000+ fonts
-
Classroom space to invite students and teachers to share and review work
-
Share activities and homework on Google Classroom, Microsoft Teams, and Remind
-
Integrations with all your go-to classroom tools – from Google Classroom, Microsoft Teams, Canvas, Schoology, and more coming soon
‘Canva for Education’ is available free globally to all educational institutions and qualified teachers, though you will need to prove your certification in the sign up process, the benefits of its free use should be well worth it.
How I’ve Added Flair to My TPT Store for Free
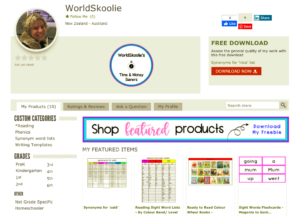
My TPT shop is quite new and I’m having to learn everything along the way. This week my focus was on personalising my TPT store beyond the basic setup that a seller’s account offers.
I noticed on the site that some people have left their stores plain on the platform but the upgraded ones look great and many of the necessary graphics for the storefront can be created by using Canva or PowerPoint.
So far I’ve added a profile photo, quote banner, leaderboard, column banner and featured some products which all help to tell what my store is all about and provide a branded feel.
Creating these in Canva allows you to choose the exact pixel sizes of each item as suggested on the TPT site. Files can then be easily uploaded from Canva through your TPT ‘Dashboard’ and ‘Edit Profile’ options.
Adding a quote banner was easy too. Canva doesn’t offer a 452 x 157 pixel size template so you can either use the custom size feature, save and upload it as a PNG or switch to using PowerPoint, open the ‘Design’ tab and click ‘Page Setup’. Here you can specify the size of 3 inches x 1 inch for this banner.
To save your work as images in PowerPoint, you need to press CTRL + A to select everything then choose ‘Save as picture’ and choose the type you want. Note where you save it to and uploading it will be a breeze from there.
The leaderboard section is a 718 x 90 pixel, banner-like rectangle and shows up above your featured listings. It is used to point out shop offers or for seasonal advertising. I searched up ideas for what to include in it to give me ideas of where I wanted to go with it.
I ended up saying ‘Shop Featured Products’ and ‘Download Freebie Here’ and using the palette of colours I’ve chosen to enhance continuity and make it easier for people to recognise me over time.
To upload the leaderboard, navigate to your shop ‘Dashboard’ and choose the ‘Marketing’ tab. Inside this, select ‘Customise’ (yellow wand tool) and follow the prompts to upload your files.
Store column banners show up in TPT on the left side of your products next to your listings. You can use this space to show sales, promote credit earning, add quotes or a logo.
I made my store column banner using PowerPoint to the suggested size specs and saved it but when I uploaded it to TPT, it was smaller and had lost sharpness. I went back, used the zoom tool to make it fill my screen more, and instead of highlighting all the elements and ‘Saving as’, I went ‘File’, ‘Export’ then chose to save as a GIF, which gave me a better result.
The next step I took was figuring out thumbnails for my products. I autogenerated my thumbnails from the resources themselves so that mini views of a few pages showed an example of what buyers would get.
You can modify which pages they see as thumbnails if you go into ‘Select all thumbnails’ and click on the ones you want and drag them upwards. You can have up to four thumbnails per product.
You can also create your own thumbnail designs to showcase the learning covered and more detailed contents of your work.
To show more product information you can also add a preview option. These enlarge your item for customers to get a close up view of the quality of your work so watermark these pages if you can to stop your work being copied from there.
Product covers are where I’m up to now. My first ten resources are loaded, I’ve made a Thank You/ Credit page to add to everything I load so next I’m planning to create a square product cover template that I can use and adapt as needed. It will incorporate my brand colours and a recognisable format.
It’s what customers see first so I’m feeling some impression pressure! The design should help describe the resource and maybe give an example of what the resource looks like.
These tend to take a square format on the site next to each product title so I’ll be using Canva’s square layout option to create mine. A minimum size of 750x750px is recommended by TPT.
Canva is a great tool for creating graphics that help you personalise things like a TPT store for free. I really like that it’s free and easy to use to create unique graphic designs. I’ve used it to create birthday invitations in the past which can either be printed or emailed out.
Pins and posters are pretty easily created too. I used Canva to create the ones below myself. And as there’s a ton of free imagery and templates to choose from, you never have to start from scratch, saving yourself heaps of time.
Of course you can pay to get premium graphics and other options too like saved branding colours and so on but this post is about how to use smart tools and DIY approach to save some time and money.
If you want to get creative and save time and money on your graphic design, I recommend using Canva and PowerPoint for their versatility, widespread availability and their ease of use as effective graphic design tools.
To join Canva and get started on a design now, click here. When you do, we’ll both get to choose one of their premium photos, icons or illustrations to use for free, which is pretty neat.
If you want to try out Canva Pro and get access to all their clipart, templates and jazzy fonts you could sign up for a 30 day free trial and it’ll cost you nothing to try out all the premium features for a month.
If you found this post useful, please pin one of the images below or share it so others can benefit too.
Thanks!

Meagan
