How To Add A Picture To Your Store Profile Information
Teachers are on winter holiday break right now here so I’ve had more time to spend on TPT the last few weeks.
One of the things I’ve wanted to do for ages was add new animated gifs in my quote, shop banner and column banner boxes on my store front.
In my quest for learning how to do this, I came across several helpful online tutorials and after several hours of elbow grease, I am now the proud new exhibitor of upgraded store graphics.
My latest improvement has been to add a picture of myself to my store profile page as my shop logo doesn’t include me in it.
I first saw that this was possible on a Teachers Resource Force blog post but never got anywhere with it.
Now, with my extra portion of time, and some coding trouble shooting, I am pleased to say that I achieved at least one of today’s many goals!
In case you’d like to do it too, here’s how I got it to actually render and in the way I wanted.
Adding A Picture To Your Store Profile Information
Here’s what we’re aiming to do looks like…

How To Do This
Step 1
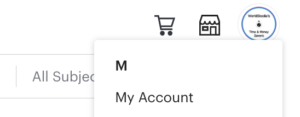
Click on your shop logo in the top right of your store page. Choose ‘My Account’.

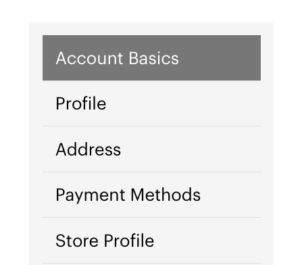
Then on the left side drop down the menu and select ‘Store Profile’.

Scroll down to the bottom of that page and click on the reddish ‘Edit’ button in store profile to make changes.
*Note: I decided to add my portrait shot to the ‘Additional Bio Info’ box but you could insert an image wherever you want it.
Step 2
Underneath the last paragraph of written text, type in the following code:
<br>
This tells it to move down a line. It’s code for ‘Enter’ and makes a space.
Step 3
Then type or paste in.
<div style=”text-align:left;”>
This tells the picture you’ll be adding to be aligned to the left side. Type <center> here instead if you want the image in the middle.
Step 4
This next code step says which picture you want to render and closes the alignment tag too.
Type or paste in <img src=”…(your image’s URL)…/></div>
So in this section, my final code was like this:
<img src=“https://www.worldskoolie.com/storage/2020/05/Meagan-circle-face-300×300.png” alt=”Meagan-circle-face-300×300.png” /></div>
Instead of the blue text you see in my code above, you’ll need to use your image’s URL.
To get this image URL, I went to my website and right mouse clicked on my profile pic that was loaded at the time.
I then selected ‘Copy Link Address’ and pasted that code in place of the dots… in the code string <img src=”…/></div>
Step 4
Finally, I put another enter tag underneath the image to space it out better.
<br>
Then I decided to add a link in to my website too.
I typed what I wanted readers to see:
For more time and money saving ideas, check out
Then I pasted this tag in:
<a href=”https://www.worldskoolie.com/”>worldskoolie.com</a>
It made the words in blue render as a hyperlink that links back to my website.
So the whole code insert looked like this inside my profile information box:
<br><div style=”text-align:left;”>
<img src=”https://www.worldskoolie.com/storage/2020/05/Meagan-circle-face-300×300.png” alt=”Meagan-circle-face-300×300.png” /></div>
<br>
For more time and money saving ideas, check out <a href=”https://www.worldskoolie.com/”>worldskoolie.com</a>
Once you click ‘Save’, the code renders what you’ve asked it to do and you shouldn’t see any of the tags (coding) on your profile page once you go and check the updated Store Profile.
I feel like these two features are nifty additions to any store profile.
If it’s something you’d like to do, I hope you find my instructions super easy to follow.
Please pin to share this.

Thanks!

Meagan

