Teachers Pay Teachers (TPT) is an online marketplace that empowers educators to share and sell their teaching resources.
Whether you’re a seasoned educator or a new teacher looking to showcase your creativity and expertise, uploading your resources to TPT can help you reach a wide audience and make a positive impact in the education community, as well as earn you an income.
In this step-by-step guide, we’ll walk through the process of uploading resources to TPT and maximising your success on the platform.
Uploading Resources to Teachers Pay Teachers for Beginners
Step 1 Prepare Your Resource
Before you begin the uploading process, it’s crucial to ensure that your resource is well-organised and properly formatted.
Here are a few key steps to consider:
1. Create your resource in a flexible application such as PowerPoint or Canva so it’s easier to make and edit. Make sure you also acknowledge the work of any clip art/ other artists used in your resource creation and only use products that provide commercial use agreements as you’ll be selling your product with their work in it.
Don’t use any trademarked art e.g. Disney/ book characters in your work as it’s not allowed, even though you may see others doing so.
2. Review and Edit: Carefully review your resource for any errors or typos. Make sure the content is accurate, relevant, and aligned with the target grade level or subject area you’re aiming at.
3. Format: Ensure that your resource is presented in a clean and visually appealing format. Use consistent fonts, headings, and colours to enhance readability and appeal.
4. File Types: TPT supports a variety of file types, including PDF, PowerPoint, Word documents, and ZIP files. I suggest using PowerPoint to create. It is widely available and there is lots of training content for it online. Plus you can create templates which will save you time in future.
Step 2 Create A Seller Account To Upload Resources To TPT
To create an account:
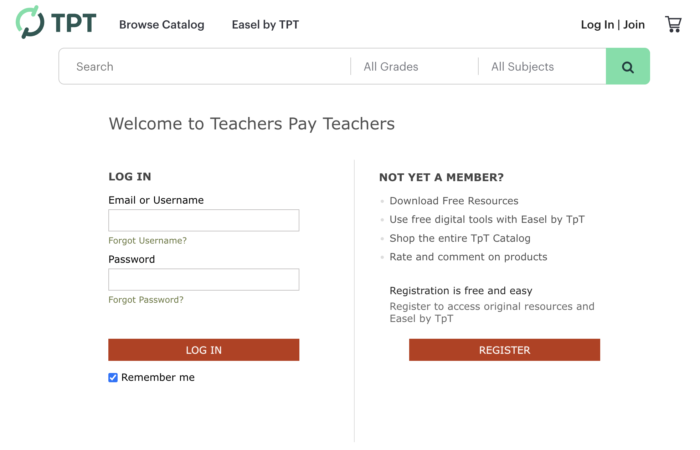
1. Visit the TPT website (www.teacherspayteachers.com) and click on “Log In/ Join” in the top right corner of the homepage, next to the cart clip art.
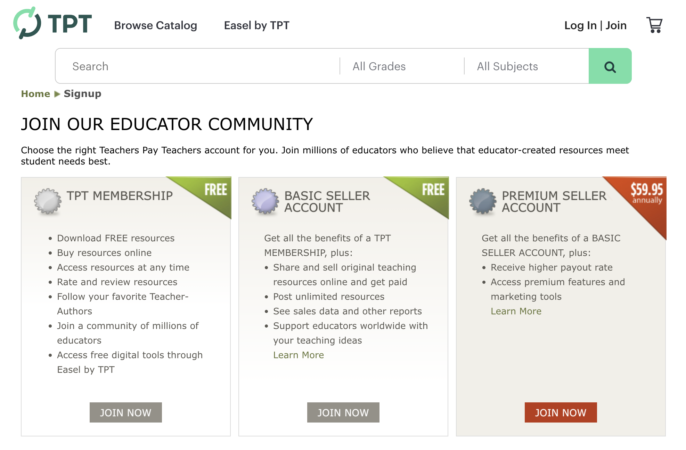
2. Choose “Join” to create a seller account. There are three options.
I started with the FREE then converted to a Basic Seller Account (also FREE) and then to the Premium Seller Account once I was making sales and had about 15 products listed because the amount you get from sales moves from around 45% to 80% of the sale amount.
3. Fill in the required information, including your name, email, and password etc.
4. Agree to the terms of use and privacy policy, and then “Continue.”
Step 3 Upload Your Resource
Once you have your seller account set up, it’s time to upload your resource.
Here’s how:
1. Sign in to your TPT seller account.
2. Click on your username in the top right corner and select “Dashboard” from the dropdown menu.
3. In the sidebar, click on “Add a New Product.”
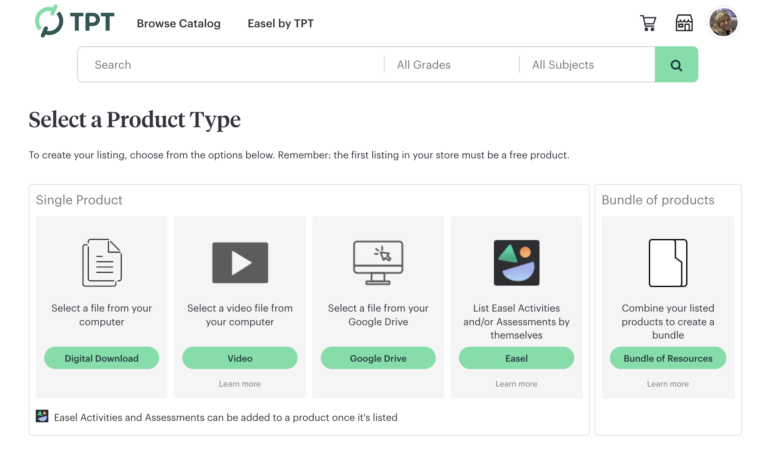
4. Choose the appropriate resource type e.g. digital download.
5. Fill in the product details, including the title, description, grade level, subject area, and keywords. Be descriptive and use relevant tags to optimise search-ability.
6. Upload your file(s) by clicking on the “Select File” button or drag and dropping them in. If your resource includes multiple files, you can add them as a ZIP file.
7. Set the pricing for your resource. TPT allows you to set your own price or offer it for free. Note that the first resource that you create and upload has to be offered free as per TPT’s terms and conditions.
8. Add any additional details, such as education standards alignment, credits etc. Add information about your product in the text box below all the previews. Include instructions for use.
You can add links here to other resources you’ve made too. Bearwood Labs has created a handy app to help you create hyperlinks using your TPT store address. You can then cut and paste these into your description.
9. Preview your resource and make any final necessary edits or adjustments.
Step 4 Add Product Images and Previews
To make your resource more appealing to potential buyers, it’s essential to include high-quality images and previews when you list it.
Follow these tips:
1. Click on the “Previews” tab in the product creation process. Add your preview file. I used to use PowerPoint but now make mine in Canva presentation format using screenshot images from my PowerPoint resource. This preview file, which often includes a few sample pages, gives potential buyers a glimpse of what they can expect.
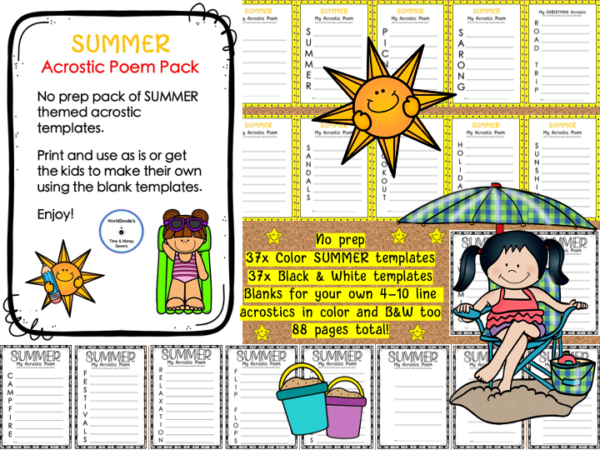
I also make a MP4 (video preview) file using Canva. It shows exactly what you get when you buy the resource and it’s visual which appeals to many. It is added to the “video preview” upload box on TPT.
In these, highlight what you want buyers to know about your resource e.g. Print & Go/ B&W and Color etc. Also, if I’ve used clip art from another creator, I opt to ‘flatten’ my files within Canva first then download them as a pdf/mp4 to upload into TPT. This stops others stealing their images.
2. In the “thumbnails” section, choose to add them now. Put a cover image in the first block that accurately represents your resource. This is the picture that shows up when your resource is searched so it pays to make it count.
I create my cover images in Canva. There is a lot of guidance online for how to do this. Watch videos at 1.5x speed to get through them quicker. I pause or re-run video so I can try out the new skill alongside as I learn.
Once you’ve made a cover you can edit it and rename the new one which, moving forward, saves you time.
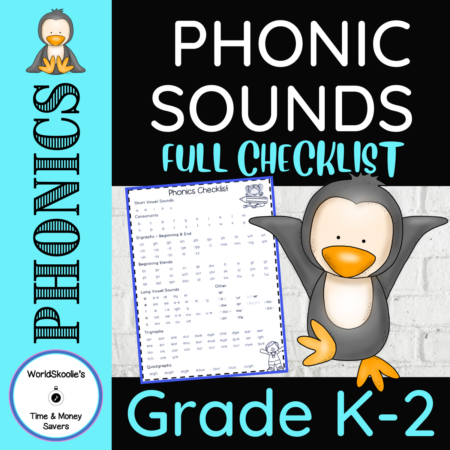
Before making covers I recommend looking at other sellers ones on TPT to get ideas of how you’d like yours to look. Create something that has a brand look to it so people come to recognise your work. You can check mine out here but make yours your own.
3. Finally, upload three additional images or screenshots in the remaining upload spaces that showcase the content and design of your product.
To improve your SEO, make sure you rename these files to include words relevant to the main topic of your resource e.g. “verbs for elementary” as this will help people find it. I put page screenshots in these remaining boxes.
Step 5 Finalise and Publish
In the final step, you’ll review your resource and set it live on TPT.
Here’s what to do:
1. Review all the resource information you’ve provided to ensure its accuracy.
2. Then check all the options in the lower sections such as standards, grade levels etc. that apply to your work.
3. Finally, check the “Make Listing Active” when you’re ready for it to go live and click on the “Submit” button to submit your resource.
3. TPT’s review team will assess your resource to ensure it meets the marketplace guidelines.
4. Once your resource is approved, it will be published on TPT, and you can start promoting it to potential buyers via email or other media channels you have.
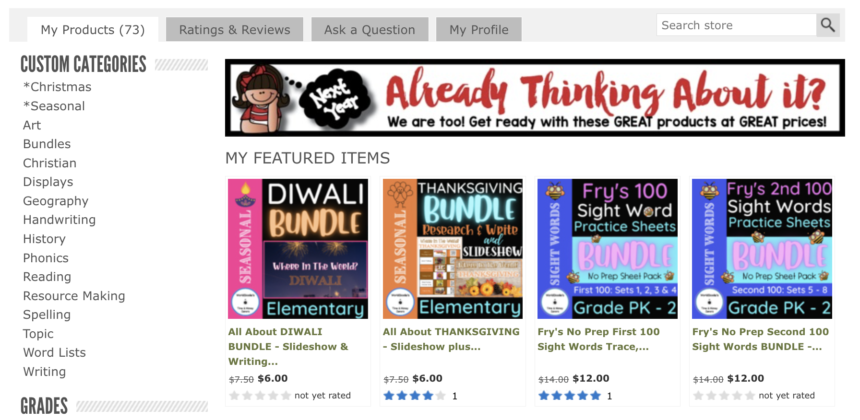
5. Once you have resources listed in your new shop you can set certain ones to be featured – up to four and they’ll show up the top on your shop page. You can also customise your categories as seen on the left below. Putting stars or icons next to certain labels bumps them to the top of the list.
Uploading your resources to Teachers Pay Teachers is a fantastic way to share your knowledge, expertise, and creativity with the education community while earning an income from work you’ve likely done or will do anyway.
By following the step-by-step guide outlined above, you’ll be well-equipped to showcase your resources effectively and make a positive impact in classrooms around the world. For more detail, you can read my other post about uploading to TPT.
Start sharing your valuable teaching materials on TPT and contribute to the growth and enrichment of education while also potentially earning yourself a growing passive income.
Some sellers make thousands a month in sales but only you can decide if it’s worth giving a go.
Please pin to share this.
Thanks!

Meagan

