Colouring pages are not just for kids anymore. They have gained immense popularity among adults as a therapeutic and relaxing activity.
If you’re looking to create your own custom colouring pages for kids or adults alike, PowerPoint can be a surprisingly powerful tool to bring your imagination to life.
In this blog post, we’ll guide you through the step-by-step process of using PowerPoint to make captivating and personalised colouring pages that will spark joy and unleash your creativity.
Unleash Your Creativity: Creating Colouring Pages You Can Sell with PowerPoint

Step 1
Set up your PowerPoint canvas: Open PowerPoint and create a new blank presentation. Adjust the slide size to your preferred dimensions, keeping in mind the standard colouring page size is usually 8.5 x 11 inches.
You can set these dimensions by clicking on the “Design” tab, selecting “Slide Size,” and choosing “Custom Slide Size.”
Step 2
Choose your background: The background of your colouring page sets the tone and atmosphere. Consider selecting a simple solid colour or a gradient that complements the theme of your colouring page.
To change the background colour, right-click on the slide, choose “Format Background,” and select your desired colour or gradient. If you want simple black and white, consider not adding a background, maybe just a page border.
Step 3
Insert shapes and images: PowerPoint provides a vast collection of shapes and images that you can use to create unique colouring page designs.
To insert shapes, go to the “Insert” tab, click on “Shapes,” and choose from the variety of options available. Resize, rotate, and arrange the shapes to form interesting patterns or objects.
You can also insert images by clicking on “Insert” and selecting “Pictures” to add illustrations, patterns, or intricate designs to your colouring page.
If creating your own graphics isn’t on the cards, grab some free online. Sources such as Pixabay, Fiverr and TPT are great places to start.
If you’re planning to sell your work though, make sure you only use art in your work that allows for commercial use – check terms of use and licensing information carefully.


 Images from Pixabay
Step 4
Customise your colouring elements: Now comes the fun part – customising the elements on your colouring page.
Select the shape or image you want to modify, and you will see several formatting options appear on the PowerPoint toolbar.
Experiment with different fill colours, outlines, gradients, and effects to achieve the desired look for each element. Don’t be afraid to mix and match different combinations until you’re satisfied with the overall design.
Step 5
Add details and patterns: To make your colouring page more engaging and intricate, consider adding details and patterns to your elements.
PowerPoint provides various tools to help you achieve this.
You can use the “Shape Fill” options to add textures, patterns, or even images as fills.
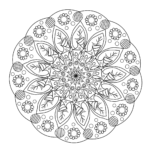
The “Shape Outline” feature allows you to adjust the thickness and style of lines, enabling you to create beautiful patterns or mandala-like designs.

Step 6
Create interactive elements (optional): If you want to take your colouring page to the next level, you can add interactive elements using PowerPoint’s animation and hyperlink features.
For instance, you can create hidden surprises that appear when a specific part of the colouring page is clicked or make elements change colour when selected.
This interactive touch can add an extra layer of engagement and playfulness to your creation.
Step 7
Save and share your colouring page: Once you’re satisfied with your colouring page design, it’s time to save and share it with others.
To save your PowerPoint slide as an image, go to the “File” menu, click on “Save As,” and select the image format of your choice – JPEG or PNG.
You can then easily print it out or share it digitally with friends, family, or even on social media platforms.
Selling your creations can be done through online platforms like TPT or Etsy where you can even start as a seller for free.
You can link to my TPT store front below to see more of what that looks like.
PowerPoint is a versatile and often underestimated tool for creating captivating colouring pages.
Whether you’re designing them for personal enjoyment or as a creative project, the flexibility of PowerPoint allows you to experiment with various shapes, colours, patterns, and interactive elements.
So unleash your creativity, dive into a world of colouring page design with PowerPoint, and relish the creative joy it brings.
Happy colouring!
Please pin to share this.


Thanks!

Meagan


