There is so much to learn when you’re starting out on a new venture and selling on Teachers Pay Teachers is no different.
It’s challenging to find and absorb all you need to succeed and as I love time and money savers, I’m going to share what I’ve learnt so far to get you moving forward on TPT in practical ways right now.
If you want to know about how and where to get your work watermarked, flattened to protect clipart, make covers for your products and upload your work to your store and more, this post is for you. It will guide you in exactly how to prepare and upload your files to sell on Teachers Pay Teachers.
Steps For Getting Your Resources Uploaded To Sell On Teachers Pay Teachers
1. Decide what product to make
Everyone has different skills and talents. Some are artistic and can create graphic elements. Click here to read my post about where to get some awesome graphic elements, many for free. Others use those graphics to create great printable or digital products to make other teachers’ lives easier.
I think one of the best ways to decide what to make as your first resource, is to think of something you’d love to make or use, that won’t take days, but that also offers value.
This is important because when you join TPT as a seller, the first product you list has to be a freebie. If you make it a good one, shoppers will see your work quality when they download and use it and then hopefully will follow you or buy more from you, which is exactly what you want.
You can offer more than one product as a freebie and several sellers do this, but remember too that you’re there to make a profit, so you might want to aim at a rough 10% of your products offered as freebies and see how you go.
2. Decide what programme to use to make your resource
I made my first TPT resources on Word. This was because I was familiar with its functions and was making list type products without many integrated graphics.
However, when you want to make cute looking resources with multiple layers, loads of clipart or fancy layouts, PowerPoint, Illustrator or Canva are a much better bet.
They are bespoke graphic design programmes, with all the related tools in-built. They make resource creation tons quicker once you know your way around them.
I personally love Canva for creating product covers. You can upload your graphics, photos and fonts into it and use them in your creations. I’ve created templates and now saving a copy and making new versions of covers is really quick. Plus, they download as PNG so come out flattened automatically.
If you’re an educator, you can qualify for ‘Canva For Education’ which gives you free access to features usually reserved for Pro package users. You need to verify your teacher status with them when you apply to get this access.
3. Learn how to make resources quicker and better from veteran users
For training in various ways to create resources and sharpen your TPT skills, you might like to check out some online lessons or courses. These can be helpful guides and speed your learning along plus you can speed up the replay in the settings on Youtube to get answers quicker!
In my quest for all things TPT, I found Becca Davis. She’s been using TPT for years now and teaches others how to do better on the platform. I’ve found her videos useful for the things I’ve wanted to know so far.
4. Add a copyright label to all your products
In an effort to protect your original work, add the copyright symbol, your name/ shop name and the year to all your products. If there are multiple pages, put it at the bottom wherever you can.
I usually add this by colouring my text grey, choosing point size 10, a clear font and then centre the text about 1cm from the page bottom in a text box as you can reposition these easily.
It looks something like this… © WorldSkoolie.com
To save me typing my copyright tag (and other hyperlinks) out all the time, I’ve pasted them into an Excel document where I can access them quickly, and simply copy and paste them where needed. Time saving!
5. Save your documents as a PDF or PNG
If your work includes graphic elements like clipart from creators who allow you to use it commercially, according to their terms of use (TOU), you usually have to secure it so others can’t lift it from your products.
Saving as a PDF doesn’t protect clipart sufficiently so you also have to ‘flatten’ your product before listing it on TPT. This basically means that all the elements get melded together and can’t be copy/ pasted from your uploaded files.
Most of the time I list my products as PDF files as they can be viewed by most people’s devices and don’t rely on buyers having a certain programme e.g. PowerPoint in order to view it with all the fonts etc. that you used.
Often you can save a file as a PDF and have the document maintain its integrity but I made a thank you/ credits page using funky fonts that included hyperlinks to social media accounts.
Saving straight to PDF format kept the formatting but the linking was lost. Using smallpdf.com I finally managed to save it as a pdf with hyperlinks intact but the fonts reverted to something more plain.
6. Take screenshots of your product pages
Once I’ve saved my file as a PDF, I open it and take snap shots of three of the pages that I want to showcase on TPT. I use these on the covers of my products so customers have an idea of what it looks like. I also use these shots in my thumbnails section.
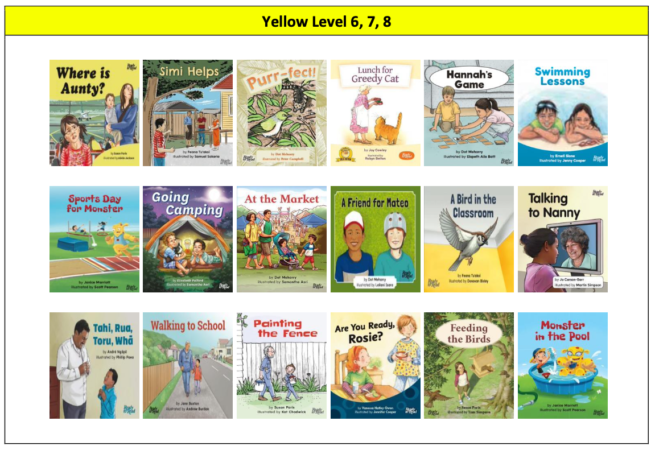
In addition, I watermark one of them to include in the TPT preview box as this one enlarges and you don’t want people copying your work from there.
To clip an image, you can use the Snipping Tool in Windows or Snapshot function on Macs. An Apple shortcut is holding down Command, Shift and F4 at once.
The cursor turns to cross hairs and lets you drag a box around what you want to capture and when you release, it snaps the included material to the desktop where you can leave them for the time being.
7. How to add a watermark to files
If you want to protect content, a good way can be to watermark any of your pages that people can preview at a large size. I watermark the image that I save into TPT’s Preview.
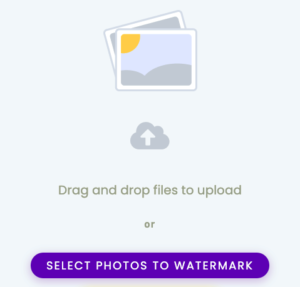
To do this, go to watermarquee.com and drag your files into the centre section.
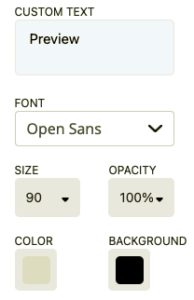
In the text box type the words you want to appear. I usually type ‘Preview’ at size 25 or 90 depending on how big my screenshot rendered on the screen. I choose font colour e2e2e2 grey and the text then appears typed across my example file.
After that, move the text box on the screen to where you want to place it then select the purple ‘Download’ button.
![]()
Scroll up and tap the purple download cloud as well. This saves it to my downloads folder.
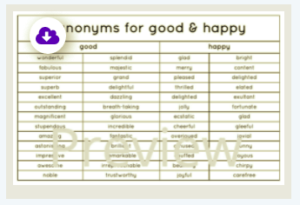
From there, I move it to my desktop space alongside my snapshots and rename it – file name + preview – so I know it’s the watermarked one.
To watermark additional files, click the red circular ‘Startover’ button and repeat this process.
8. Making a cover in Canva
All your products will look far more professional if you create attractive, eye-catching covers for each one. Covers are small squares that appear alongside every product you list on TPT. They recommend a minimum cover size of 750×750 pixels.
I‘ve experimented with different sizes up to 1200x1200px and I haven’t noticed any outstanding differences. If you take the paid version of Canva, resizing all your graphics is really easy and no visual quality seems to be lost when you do it.
The free version doesn’t offer resizing functionality but you can set your template size when you start. If you want to try it out, you could try Canva’s free month’s trial which gives you access to all features. After the free month it’ll cost you $19 monthly.
Basically, your options are: use the free version of Canva, pay monthly or apply for ‘Canva for Education’ if you can verify your active teacher status.
*You can of course also use PowerPoint to create covers if you prefer. In this case, just set your page size at the start to be the equivalent size you want in inches/pixels. There are online calculator tools you can use to covert any dimensions needed.
Top Tips For Covers
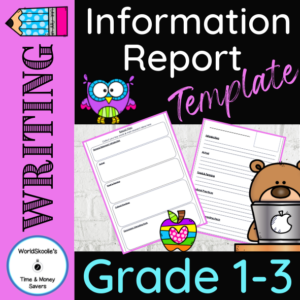
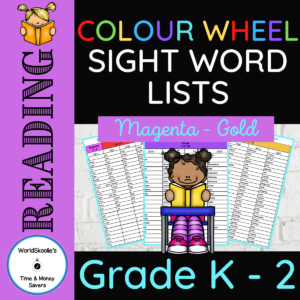
Make your key words bold, large and clear. Contrasting colours work well.
Add your TPT shop logo to your cover somewhere.
Think of a way that you want to categorise your products.
Will it be by subject? Will you use colours to differentiate covers or subjects? Will certain clipart identify them? Will each be unique?
In terms of branding, it’s good to decide in advance about how you want people to begin recognising your shop and products and go with that.
Add the age range your product targets. As TPT is a U.S. based platform, remember to include terms that will make sense to their main users e.g. Grades.
Add cute clipart that enhances your cover’s message or beauty. Only use clipart with commercial use allowances and always give credit to these creators. You can upload any of your saved clipart into Canva using the ‘Upload Media’ button on the left side if you choose to make them with it.
Insert small picture ‘Frames’ on your cover images (found in ‘Elements’) to add your product snapshots to. This gives viewers a glimpse of what they’ll be getting. I don’t use the watermarked snapshots for this as they don’t appear clearly on covers.
Give your cover a suitable file name and download it as a PNG file then move it to your desktop.
9. Merging PDFs
Next you’ll need to combine your product PDF file with your Thanks/Credits page PDF. To do this I use the merge pdfs tool on ilovepdf.com. If either of your PDFs has licenced clipart in it, first flatten them. You can use this free pdf flattening tool online at sejda.com/flatten-pdf.
Back to merging… have ilovepdf open. Drag your files across, arrange them in the order you want them to merge – I put my Thanks page first by habit – then click the ‘Merge’ then ‘Download File’ buttons. Rename your merged file and move it to your desktop with the others.
Smallpdf is another online tool that’ll do this but the free version offers only two merges daily.
10. Combining everything
Now you have all you need to put together a great product to upload to TPT.
Here’s how to do it…
Assuming you have created a TPT seller’s account, open your store to ‘Product Listings’ and click on ‘Add new listing’. If you haven’t got a store yet, open a basic account then convert it to a seller’s account and you’re ready to go.
If you’ve had a store for a while and have similar products listed to the one you’re adding, you could instead select ‘List Similar Product’ in the older product’s ‘Quick Edit’ option where your products are listed.
This way is quicker as you can just change the parts of the listing that need editing to suit your new product and leave the other descriptions in place.
Next, add a product title in the top box, drag your merged PDF file from your desktop to the ‘Files’ section.
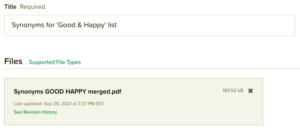
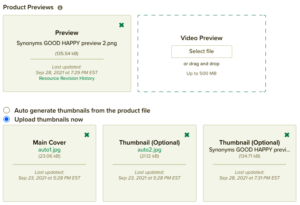
Add one of your watermarked snapshots to the ‘Preview’ box. Premium TPT account holders can also add video previews of products.
Choose the ‘Upload Thumbnails Now’ option, drag your cover PNG you made into the main box (furthest left) and three of your product snapshots taken into the remaining three spaces.
Add a detailed product description so buyer’s know exactly what they’re getting. Add hyperlinks to a few of your other listings here too.
Set your price. Remember basic sellers get 55% of total sales less 30c per product sold so don’t price too low. Too high and no one will buy. Looking around TPT can give you a good idea of reasonable prices to ask.
Set the grade levels your product suits best. I click all that I think apply plus homeschool. If it’s a general resource, just select ‘No Specific Grade’.
Set the tax code to the ‘Digital images/Electronic Download’ option if that best describes it.
Set the subject areas your product covers and ‘Resource Type’. I often choose three for each such as ‘ELA, Creative Writing, Writing’ and then ‘Printables, Worksheets, Parents’. It varies for resources so choose those that you think best describe your product.
Set the CCSS (Common Core Standards) your resource fulfils.
‘Submit’ it. Listing done!
11. Cleaning Up
Now you have listed your product to TPT! It should show up within an hour of pressing ‘Submit’ but they usually load quicker than that. Now you can tidy up your desktop.
I’ll share how I do this but develop whatever method suits you and habitualise it.
I have a folder called ‘Uploaded to TPT’ on my desktop. Inside it are folders called ‘Product Screenshots’, ‘Watermarked Screenshots’, ‘Merged PDFs’, ‘Product files’ and ‘TPT Covers’.
First, while all files are still on my desktop, I create a Pinterest pin for my new product using its cover image, then I move the desktop copy of it to the ‘TPT Covers’ folder.
Then, I shift the plain screenshots I took into my ‘Product Screenshots’ folder. The watermarked ones go into ‘Watermarked Screenshots’ and my product’s PDF into the ‘Products’ folder. The merged PDF file goes into ‘Merged PDFs’.
This leaves my desktop cleaned up, my files stored in one place so I can repeat this process once I have a new resource to upload.
I hope this has given you some action points for getting started uploading to TPT.
Please pin below so others get to see this post.
Thanks!

Meagan

